
Home Brewing Kits - FAQ
Browse brewing kit frequently asked questions. We’ve got answers to the most common queries from brewers like you. Worried about your yeast? Curious about carbonation? Find answers to brewing kit frequently asked questions below. If you can’t find what you’re looking for here, contact us at support at craftabrew.com.
If you don’t see your question answered here, shoot us an email at support@craftabrew.com! DO NOT discard anything until you are able to connect with our team - we can help you save your beer :)
How To Bottle Your Beer
Help, I lost my instructions!
Find all instruction manuals & brewing guides from all of our kits HERE
Pre-Brewing / About Our Kits
- Our 1 gallon brew kits & recipe kits yield a gallon of beer - which is about ten 12oz bottles or eight 16oz bottles.
- Our 5 gallon beer recipe kits yield about 50 12oz bottles of beer.
As long as you stick to the provided Guide to Craft Brewing, your first batch will turn out great! Ask any homebrewer how they felt right before they tasted their first batch of homebrew and most will reply that although their expectations were low it turned out way better than expected, even rivaling some of their favorite beers. I think you’ll be pleasantly surprised with how well your beer will turn out and you may find you will never want to go back to store bought!
We source all of our ingredients from the same supplier that the craft brewing industry uses for their own beer. This ensures we always have the freshest ingredients on hand that meet the strictest requirements of the American brewing industry. To learn more about extract brewing and our recipes, check out our blog post on the topic!
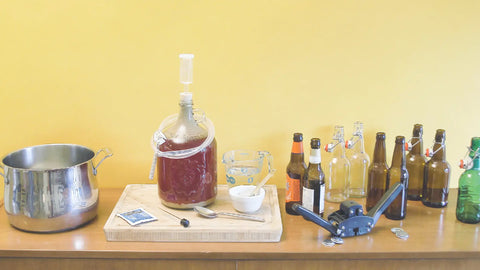
Our 1 gallon kits come with almost everything you need to brew your own beer. The only things we don’t provide are:
- A pot to brew in: any large stock pot will work. Just make sure it can fit as close to a gallon of liquid as possible (or at least 2.5 gallons when brewing our 5 gallon recipes)
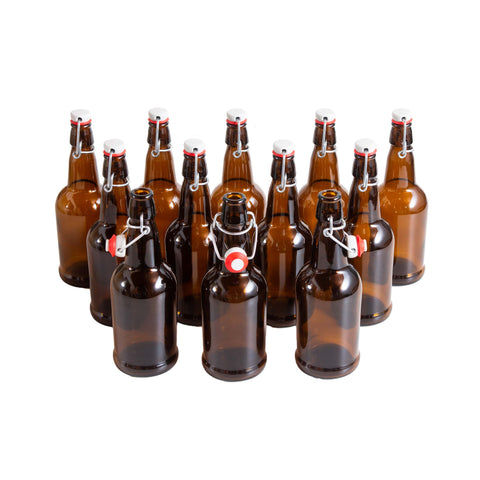
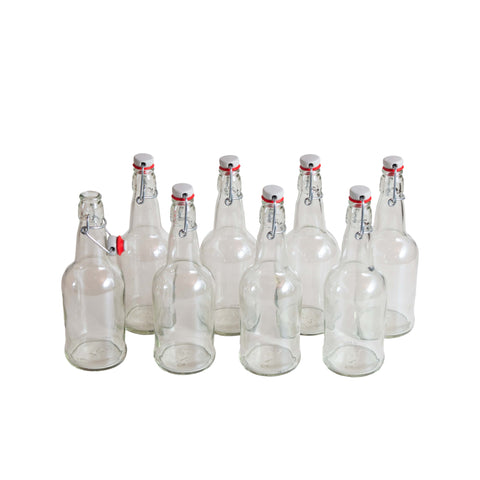
- Bottles: your beer will need to be carbonated after fermentation. You can try one of our bottling kits (flip-top or pry-off), you can recycle Grolsch flip-top bottles. You can also recycle any pry-off beers you drink at home & use with our Capping Kit
Brewing
It is normal to lose some amount of volume during the boil. If after filling up your carboy you notice the liquid doesn’t reach the 1-gallon mark simply add cool water to do so. Your beer will be just fine!
You can always add your personal touch to our beer recipe kits. Some of the easiest ways to customize a beer recipe is with our pre-measured special ingredients, like cacao nibs, lactose, oak chips & more.
If you’d like to brew with fruit on your first try we recommend our O.G. Orange Golden Ale, which includes sweet orange peel, or our Florida Weisse kettle sour kit, which includes instructions for souring & fruiting your beer.
If you prefer to choose your own adventure, we cover this topic in great detail on our blog - click here!
In brewing, hop additions work like a countdown. Our beers feature a 60 minute boil and hops are added at specific times within those 60 minutes. A “Bittering” hop addition is also referred to as a 60 minute addition, meaning these hops are added with 60 minutes left in the boil. A 30 minute hop addition is added with 30 minutes left in the boil. A 15 minute “Flavor” addition is added at 15 minutes left in the boil and a 2 minute “Aroma” addition is added with 2 minutes left in the boil.
Fermenting
If you aren’t seeing signs of fermentation right away, don’t worry! The “lag phase” of fermentation can take up to 72 hours, meaning the yeast may take up to that long to adjust to its new environment. If it’s been longer than 72 hours, try moving your carboy to a warmer spot in your house, as yeast are not very active at colder temperatures. You can also insulate the fermenter with a blanket or towel to help boost fermentation temps.
During peak fermentation, a heady foam will billow up inside your fermenter. It can be white, brown & green (from hops). This is called krausen & it’s totally normal. In fact, it’s a sign of a healthy fermentation. This foam is made up of spent hops, yeast, proteins and other particulates. It’ll dissipate after a couple of days, leaving a ring around your carboy.
Don’t worry - your beer will be fine :) This has happened to every homebrewer at some point. The minimal exposure to the air won’t be detrimental to your beer and there’s little to no risk of contamination, especially since it’s still in the early stages of fermentation and the yeast is busy at work! You can rinse the stopper, pat dry with a paper towel & return to the carboy.
The stopper likely popped out because there was a kink or sediment clog in the tubing, the yeast was just super active and pushing lots of CO2 up and outward or the fermentation temp’s on the warmer side & causing the yeast to be more active than usual. If you live in a warmer area or ferment in the summer season, you can always try one of our favorite tips: use a rubber band to help keep the stopper in place.
That’s totally fine. There's no hard & fast timeline for swapping the blow off tube for the airlock. The blow off tube/water and the airlock serve the exact same function: letting CO2 escape, while keeping oxygen out of the carboy. The airlock is simply a space saver! The tubing can be used for the entire fermentation process & won’t harm the beer. In fact, giant blow off tubes (& large buckets) are how commercial breweries handle CO2 release - look out for them on your next brewery tour.
If you’re still seeing fermentation activity & bubbling in the airlock this means that your beer is still fermenting and should not be bottled just yet. Bottling too early can lead to overcarbonation or even “bottle bombs” Continue to let the beer ferment until airlock activity & bubbling have completely stopped for a full day or 2.
Fermentation may have been slowed down by a few things:
- Fermenting at too low a temperature
- Losing volume on brew day & not topping off to reach a gallon. This would mean there is a concentration of fermentable sugars by volume - so the yeast are
- the yeast may have experienced a longer ‘lag phase’ (the time between pitching the yeast and seeing fermentation activity begin). Try moving the fermenter to a warmer location or insulating with a towel to boost the temperature.
If you’ll be away from your fermenter whenever your beer’s scheduled to be bottled it is completely fine to let the beer stay in the fermenter longer than the 2 week fermentation timeline. You can bottle upon your return. NEVER bottle early! Doing so will transfer unfermented sugars into bottles, which can create dangerous levels of pressure during carbonation. This can result in over-carbonation or dreaded bottle bombs.
Letting your beer ferment longer won’t pose any risk. If anything, the additional time can help with better sediment separation or improved clarity!
Bottling / Carbonation
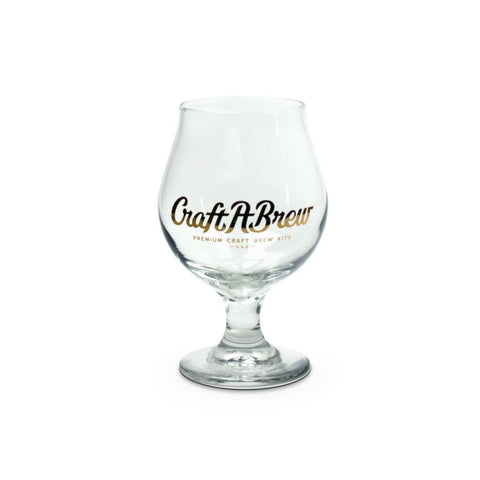
There are plenty of options depending on your preferences. If you drink beer at home, start saving your empties (pry-off bottles only) - you can use our Capping Kit to seal them! You’ll need ~10 12oz bottles or ~8 16oz bottles per gallon of beer.
If you need bottles & caps try our Deluxe Bottling Kit. It includes ten 12oz amber pry-off beer bottles, a capper tool & 30 caps (enough for 3 batches).
If you don’t like the idea of disposable bottle caps, try our Flip Top Beer Bottles. These 16 oz bottles are available in sets of 8 or 12, choose from clear or amber glass. For beer, amber glass is usually recommended to prevent light strike (aka “skunked” beer).
Yes - bottling is a crucial part of the homebrewing process. Bottles are designed to withstand the pressure of beer as it carbonates. But growlers are only intended to transport beer that is already carbonated. So we usually advise against growlers and recommend using beer bottles because they’re safe and tested.
Don’t worry - if you have to stop bottling day or put it on pause, just place the stopper/airlock back into the carboy.
The siphon technique is worth practicing with water once or twice before bottling day. Remember - distance & height are crucial for starting & maintaining a siphon.
Your carboy (or full vessel) should be placed high up on a table, while the empty vessel (pot or bottles) should be placed as low as possible - the ground or a chair.
If the siphon isn’t starting it could likely be because there’s not enough distance. It could also be due to not filling the tubing with enough water.
Once you get the hang of a siphon, it’s pretty straightforward. But if you want a smoother bottling day, we recommend our mini auto-siphon. It gets a siphon flow started with a few pumps - no bowl of water needed.
Don’t worry - it can be improved! Low carbonation usually just means that the yeast needs some more time to create CO2. If you’ve moved all bottles from your batch into the fridge, bring them out and let them stand at room temperature for another 3-5 days before chilling a bottle & testing again. Low carbonation can also be caused by: too much headspace in bottles, carbonating in too cold an environment, not using enough priming sugar or having an improperly sealed cap.
For future brews, try our pre-measured Priming Sugar packs or Carbonation Drops.
If your beers are a bit too carbonated, we recommend immediately refrigerating all bottles from the batch. This stops the yeast from creating any more CO2. When handling over-carbonated bottles, you can prying off the caps slowly to allow a little CO2 to escape before fully removing the cap. If you have flip top bottles, we open above a bowl to catch any spill over/foam. If the bottles are gushers, we suggest placing a zip lock back over the bottle & a bowl underneath - these help keep the geyser from making a mess and collect the overflow so you can transfer to a beer glass.
Over-carbonation can be caused by a number of things:
- Volume loss on brew day. If you experienced evaporation on brew day (totally natural), but didn’t add water back to top off the full volume this could lead to overcarbonation. This is because you’re fermenting a more concentrated wort with a higher sugar content by volume. This creates a bit more work for the yeast so the yeast may not completely finish fermenting at the 2 week mark, meaning some unfermented sugars remain in the solution. When you go to bottle the beer, these unfermented sugars combined with the priming sugar can lead to the yeast having too much fuel for carbonation.
- Bottling too early. The yeast need the full 2 weeks to completely ferment all the sugars (or sometimes longer if your recipe calls for a longer fermentation, like Chocolate Milk Stout or Belgian Abbey Dubbel). If the beer’s bottled before the yeast is done, these unfermented sugars can cause overcarbonation in bottles - similar to #1.
- Letting beers carbonate at room temp for too long. Beers only need about 2 weeks at room temp to sufficiently carbonate. After the 2 week mark, you can chill a bottle. Open it, pour it to test the carbonation levels. If it’s fizzy enough, move the rest of the bottles to the fridge. If it isn’t carbonated enough, let the rest of the batch carbonate for 3+ more days before testing another bottle. If left at room temp indefinitely, the yeast will continue to build up pressure.
- Too much priming sugar. Similar to #1 & #2, too much sugar in the bottled beer will lead to overcarbonation. The yeast convert priming sugar into CO2 & the more sugar in the bottles means the yeast will create more CO2.
Some amount of sediment is normal for any naturally conditioned beer. It will all sink to the bottom of the bottles after the beer is carbonated. When you’re ready to drink your beer you can avoid getting this in your glass by pouring slowly and leaving the last ½ ounce in the bottle. There is no good way to remove ALL of the sediment unless you use a professional style filter, but getting sediment in your glass won’t hurt anything except the appearance.
For future brews, try our pre-measured Priming Sugar packs or Carbonation Drops.
We recommend enjoying your bottled beer within 6 months or sooner for the best flavors. We’d suggest enjoying highly hopped or dry hopped beers, like our NEIPA, within about 2-3 months. Hop compounds are quite volatile and can degrade over time.
For future brews, try our pre-measured Priming Sugar packs or Carbonation Drops.
Sanitizing / Prepping Your Next Batch
We recommend a carboy brush to remove any residue that forms inside your carboy. It’s always best to rinse the fermenter right after bottling to prevent anything from caking or hardening. PBW (Powdered Brewery Wash) helps remove organic material from equipment. Follow with a sanitizer, like StarSan, before storing for a deep clean. Check out our blog post on cleaning your equipment for more tips!
Brewing Accessories


If you’re still stumped or don’t see your question answered above - email us at support@craftabrew.com. Don’t dump anything until we’ve connected. Including photos in your email will help us help you more efficiently.
