
How to Make Hard Cider
TL;DR: Curious about how to make hard cider at home? Craft a Brew’s Hard Cider Kit simplifies the process! Transform fresh apple juice into crisp, refreshing hard cider with minimal ingredients: apple juice, yeast, and priming sugar. Make hard cider, a beverage with deep historical roots, at home in just 20 short days!. With our kit, you'll receive step-by-step instructions and all essential equipment for fermentation and bottling. Ready to brew your own hard cider? Dive into this post and learn how to make your own Hard Cider from a gallon of juice.
Getting Started with Homemade Hard Cider
Have you ever wondered, "How do you make hard cider?" You're in the right place! Crafting your own hard cider is a rewarding endeavor that allows you to enjoy a beverage tailored to your taste.
How do you make hard apple cider? Surprisingly, it’s one of the simplest alcoholic drinks you can ferment because all you need is apple juice and yeast. Craft a Brew’s complete DIY Cider Kit will help you learn how to brew hard cider in 20 short days. The included instruction manual teaches you how to make hard apple cider at home and includes ingredients to make THREE 1 gallon batches.
Whether you’re new to fermentation or a seasoned homebrewer, if you’re wondering “how can i make hard cider?” this step-by-step process for how to brew hard apple cider is worth bookmarking! Whether you love a dry, crisp cider or prefer something sweet, we’ll help you learn how to make hard cider that suits your taste. This guide will walk you through the entire process, including the necessary ingredients, equipment, and step-by-step instructions for how to make your own hard cider. We’ll also provide troubleshooting tips, expert advice, and fun ways to customize your cider for the best results. By the end of this guide, you will have a strong foundation in how to brew hard cider and feel confident in experimenting with different techniques and flavors.
Download Our Guide to Making Hard Cider
Our guide to making hard cider will hold your hand through every step of this simple process. From fermentation to how to make hard cider carbonated in bottles.
Ingredients You’ll Need To Make Hard Cider
At its core, hard cider is a simple fermented beverage made from apple juice & yeast. At its most basic level hard cider is fermented apple juice. Yeast convert the sugars into alcohol and carbon dioxide (which is how you’ll eventually carbonate your hard cider). The best beverage starts with the best hard cider ingredients. Our complete 1 gallon Hard Cider Kit includes enough hard cider ingredients (yeast & sanitizer) to produce THREE 1 gallon batches of sparkling semi-dry hard cider. All you need to add is apple juice.The base of your hard cider will be 1 gallon of natural apple juice. You will need a total of one gallon (3.8L) of juice that is without preservatives and 100% natural. Review the ingredient label on your bottled juice and be sure to avoid preservatives like Potassium Sorbate or Potassium Metabisulfite. Such ingredients will prevent fermentation altogether. Ascorbic Acid is okay, it is just another name for Vitamin C.
Avoid “Lite” juice, as this is usually made with non-fermentable sugars and won’t be able to produce a hard cider.
You can use name brand or store brand apple juice or apple cider. Feel free to use unfiltered apple cider from an apple orchard! Clear juices will produce clear finished hard cider, while hazy ciders will produce hazy hard ciders.
Get creative with apple and fruit juice blends, like Cran-Apple juice. As long as you use at least 50% apple juice, you can use up to 50% of another juice. Here are some examples:
- 0.5 gallon of apple juice + 0.5 gallon of tart cherry juice
- 0.75 gallon of apple juice + 0.25 gallon peach juice
Yeast is a living organism that is technically a fungus. It grows and multiplies by eating the sugar in the juice, converting the sugar to alcohol and then releasing CO2 (yeast will eventually help to carbonate your cider). The Craft a Brew Hard Cider Kit includes a standard Ale Yeast that is well suited for fermenting hard ciders. It produces subtle fruity and floral notes in the finished product.
Do not use bread yeast or baking yeast, as these are not suitable hard cider ingredients. Bread yeast is not designed to produce alcohol content.
Essential Equipment
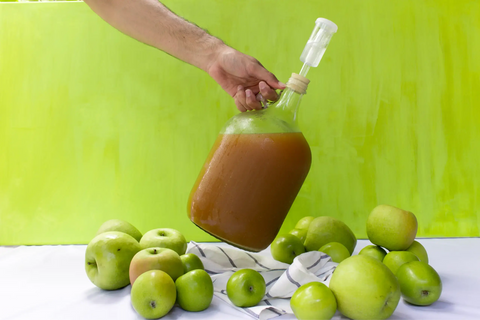
To make hard cider at home, you’ll need a few basic tools, like a fermenter, an airlock, tools for transferring between vessels and bottles for long term storage. There are additional accessories that we recommend, but are not required for making hard cider. If you’re new to the hobby, try our Hard Cider Kit! This all in one DIY fermentation kit includes everything listed below (with an asterisk) to jumpstart your home cidery and start making 1 gallon batches of hard apple cider.A 1 gallon carboy is where your apple juice and yeast become mead. A rubber stopper plugs the neck to maintain a proper seal. A carboy is included in our basic Hard Cider Kit.
An airlock creates a barrier between your cider and the outside world. When filled with water, an airlock allows CO2 to escape the fermenter while keeping oxygen, dust and other contaminants in the air from getting in. An airlock is included in our Hard Cider Kit.
A racking cane is a rigid plastic tube that is submerged into your mead to start a siphon transfer. Whenever transferring hard cider, you should never pour it from one vessel into another. This technique helps lift mead up off of sediment. A racking cane is included in our Hard Cider Kit.
Transfer tubing connects to your racking cane (or mini auto siphon) to help transfer hard cider from your fermenter into bottles. A tube clamp allows you to start and stop the flow of liquid. Transfer tubing & a tube clamp are included in our Hard Cider Kit.
A funnel is a useful tool when it is time to bottle your Apple Cider Vinegar. It helps prevent messes and ensures an efficient bottling day.
After fermentation, your hard cider will need to be bottled for carbonation and for safe long term storage. A gallon of hard cider will fill eight 16 oz bottles or ten 12 oz bottles. We personally love flip top or Grolsch style bottles, since they don’t require any caps or capping tools. But you can certainly use pry off beer bottles and crown caps.
Most importantly, you’ll need a sanitizing solution in order to prepare all of the items listed above for fermentation! A powdered no-rinse sanitizer is included with our Apple Cider Vinegar making kit. When dissolved in water, it creates a solution in which you can soak your fermentation jar, cloth cover, bottles & funnel prior to contact with ingredients. Sanitizing is one of the most important steps in the process. It helps rid your equipment of any contaminants, wild yeats or foreign bacteria that would otherwise spoil the batch.
Step-by-Step Hard Cider Recipe
Once you gather all the ingredients & equipment needed to make your hard cider, it’s time to begin!! Here’s our step by step Hard Cider Recipe for making a simple one gallon batch of sparkling, semi-dry hard cider in just 20 days.Proper sanitation is the most important step of the hard cider making process. Yeast is the only organism you want coming in contact with your apple juice. Any other bacteria can quickly spread, making the cider undrinkable. The sanitizer packet included with this kit contains enough solution for both step 1 and step 14. You’ll use only HALF of the packet each time you sanitize equipment, mixing the powder with 1 gallon of tap water. Equipment does not need to be rinsed after soaking in this sanitizing solution. Simply let components dry on fresh paper towels.
1. After you sanitize your equipment for fermentation you will add one gallon (3.8L) of apple juice directly to the carboy using the included funnel.
2. Next, add one packet of dry yeast to the juice in the carboy.
3. Take your sanitized rubber stopper and plug up the top. Now you need to make sure the yeast has oxygen to multiply so you will need to aerate the juice. Take your clean thumb and place it over the top of the rubber stopper hole. Shake the carboy vigorously for over a minute.
4. Take out your airlock and remove the cap. Fill it with water up to the “fill line,” place the cap back on & gently insert into the rubber stopper. Gently place stopper into the carboy.
5. Keep the carboy in a cool 60°-75°F (15°-23°C) dark place for 10 days to ferment. After 10 days your cider will be ready to bottle, just make sure airlock activity has stopped before bottling.
1. Rinse bottles with warm water to wash away any sediment or dust.
2. Mix the remaining HALF of your sanitizer packet with a gallon (3.8L) of tap water. Soak your bottling equipment (bottles, caps, racking cane, tubing & a spoon) for 60 seconds to sanitize. No need to rinse. Let dry on fresh paper towels, though equipment doesn’t need to be completely dry before you begin.
3. In a large stock pot, that can hold at least a gallon, add 1.5 cups (355 mL) water and exactly 2 Tablespoons (29 mL) of table sugar. This is called priming sugar. It gives the yeast fuel to carbonate your cider in bottles. Heat the water on medium-high heat and stir in the sugar until fully dissolved. Boil for 5 minutes. Cover & let completely cool.
4. Once the pot and sugar water are completely cool it is now time to siphon the cider from your carboy into the pot. This transfer helps leave sediment behind in the carboy. To start a siphon, get a bowl of fresh, clean water. Attach the tube clamp to one end of the tubing then submerge the tubing in the water to completely fill with liquid.
Next, close the clamp and attach the non-clamped end to the racking cane. Now you have a siphon starter.
5. Be sure to place the carboy high up on a table or counter. Place the pot much lower than the carboy (on a chair or on the ground) - gravity and distance are important. Attach the black filter tip
to the end of the racking cane. Remove the airlock and rubber stopper. Insert the cane into the carboy, making sure the end is far enough away from sediment so as not to suck it up. Hold the clamped end of the tube low to the ground over a glass or bowl and unclamp to drain the water & start the siphon. Clamp down once cider begins to flow out of the end.
6. Now hold the clamped end over your pot of priming sugar and unclamp to transfer the cider. Once transferred, mix gently to distribute the sugar.
7. Now place the pot up high and the bottles as low as you can. Repeat steps 4-5 to siphon cider from the pot into bottles. Fill each bottle to where the neck starts, cap & repeat.
8. Store the bottles in a dark place with a temperature between 68°-75°F (20°-23°C) for 10 days to allow the cider to carbonate.
After 10 days, move bottles to the fridge to lock in the carbonation. Leaving bottles at room temp beyond 10 days poses risks of over-carbonation or “bottle bombs.” Enjoy within 6 months for optimal flavors.
Watch Our Hard Cider-Making Video
See this Hard Cider Recipe in action in our Cider Making Video! This video is an accompaniment to our 1 gallon Hard Cider Kit. We’ll walk you through every step listed above to help you craft a gallon of sparkling hard cider.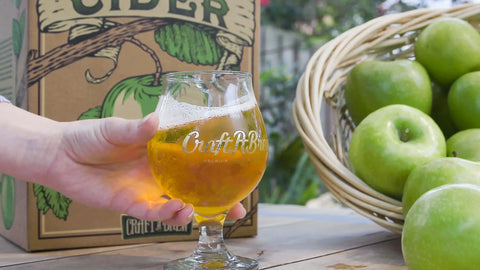
Troubleshooting and Expert Tips
Encountering issues? Here are some common problems and solutions:You don’t need to press your own apples to make hard cider! You can make hard cider using store-bought apple juice, as long as it is 100% juice and preservative-free (avoid potassium sorbate or sodium benzoate). Many homebrewers prefer unfiltered apple cider for a more traditional, full-bodied result.
If your airlock isn't bubbling after 24-48 hours, here are some possible reasons and solutions:
- Check the juice – Make sure it doesn’t contain preservatives that could inhibit yeast activity.
- Temperature issue – Yeast works best between 60-75°F (15-24°C). If it's too cold, move the fermenter to a warmer spot.
- Oxygenate the juice – Shake the fermenter for a minute to introduce oxygen, which helps yeast thrive.
Since fermentation converts sugar into alcohol, cider naturally finishes dry. To make it sweeter, consider these options:
- Backsweetening with non-fermentable sugar – After fermentation, add 2 Tablespoons of a non-fermentable sugar like erythritol to each bottle before filling with fermented cider. DO NOT add fermentable sugar, like honey, juice, white sugar, etc. to bottles - the yeast in the cider will ferment these sugars and can create dangerous bottle bombs.
- Juice blending – Pour a splash of fresh apple juice into your glass of hard cider before drinking.
Apples and other fruits have natural pectins, which can create haze in the finished product. Sediment or yeast can also create a hazy appearance if the fermenter or bottle are agitated. Here’s how to clear it up:
- Cold crashing – Store the fermenter in the fridge for 2-3 days before bottling to allow sediment to settle.
- Use pectic enzyme – Adding this before fermentation helps break down pectins that cause haze.
- Why is my cider flat after bottling?
If your cider didn’t carbonate, check these potential issues:
- No priming sugar added – Sugar is needed for yeast to produce CO₂.
- Bottle caps or seals are loose – If bottles are not properly sealed, CO2 can escape instead of being forced into the cider.
- Temperature too cold – Bottles should be stored at room temperature for proper carbonation. If they do not have 10 days at room temperature to carbonate, yeast won’t be able to convert priming sugar into carbon dioxide.
After it is sufficiently carbonated, your bottled hard cider should be stored in the refrigerator. This keeps yeast dormant so they don’t continue to ferment. This also preserves the cider’s flavor and freshness. Once chilled, we suggest enjoying your hard cider within 6-12 months for the best possible flavors.
Customize Your Hard Cider
The Craft a Brew Hard Cider Kit makes it easy to whip up a batch of hard cider in less than a month. While our kit produces a very traditional semi-dry, sparkling hard cider, you still have creative control!The easiest way to make a sweeter homemade hard cider: erythritol. Erythritol is a non-fermentable sugar ideal for adding sweetness to bottle-carbonated beverages, like hard ciders. Because yeast can't break down or ferment this sugar it won’t trigger re-fermentation, which makes it safe to add directly to bottles on bottling day.
On bottling day, add 1 - 2 Tablespoons of non-fermentable erythritol to each 12-16 oz bottle before topping with hard cider. Proceed with carbonation as usual!
Adding spices to the fermenter is a simple way to add unique flavors. After 2 days of fermentation add 2 whole cinnamon sticks directly to the carboy, continue to ferment and bottle as usual. Get creative with mulling spices, cloves, or even star anise!
Another way to customize your hard cider is with fruit. If adding fruit to your cider, be sure to add less than a full gallon of juice to your carboy. Blend a few peaches or a few handfuls of berries until they become a thin puree, add water if necessary. Strain this mixture through a cheesecloth or fine mesh strainer. Boil for 5 minutes, let cool and add directly to the carboy. Top off with more apple juice as needed to reach the one gallon fill line. Proceed with fermentation and bottling as usual.
Why Make Your Own Hard Cider?
Crafting hard cider at home is easier than you might think and comes with several benefits that you won’t get from store-bought options. Whether you want to control your ingredients, experiment with flavors, or simply enjoy the satisfaction of making something from scratch, homebrewed cider is the perfect DIY project. Craft a Brew’s Hard Cider Kit helps you learn the basics and includes all of the quality, reusable equipment needed to start a new hobby!
- Customizable Flavors for a Truly Unique Cider – One of the best parts of homebrewing is the ability to experiment with flavors. Commercial hard ciders are often limited to basic apple varieties, but when you brew your own, the possibilities are endless. Want a cinnamon-spiced cider for fall? Or a tart, dry cider with a hint of berries? You can customize your cider to match your taste and the season. Some fun variations include:
- Cost-Effective Alternative to Store-Bought Ciders – Store-bought craft ciders can be expensive, especially if you prefer high-quality, artisanal brands. Making your own cider at home can save you money in the long run. Once you have the basic equipment—like our Hard Cider Kit—all you need is apple juice and yeast, both of which are affordable. Over time, homebrewing allows you to produce premium cider at a fraction of the cost of buying individual bottles or six-packs from a store.
- The Perfect Way to Explore the World of Fermentation – If you’ve ever wanted to try homebrewing but were intimidated by beer or wine-making, hard cider is the perfect place to start. The process is simple, fermentation is relatively quick, and the results are consistently delicious. Once you master cider brewing, you might find yourself eager to explore mead, fruit wines, kombucha, or even beer brewing!
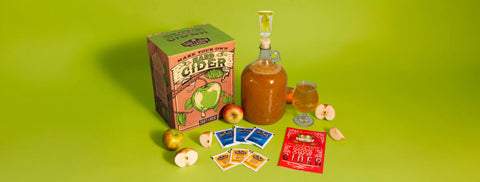
Simplify the Process with the Craft a Brew Hard Cider Kit
Making Hard Cider at home is easy. We make it even easier with our Hard Cider Kit, which includes everything you need to get started and has simple instructions for newbies. Our complete Hard Cider Kit helps you whip up a gallon of sparkling hard cider in 20 short days & includes 3 sets of ingredients for 3 batches.
Enjoy Your Homemade Hard Cider
With Craft a Brew's easy recipe, making your own Hard Cider has never been simpler. Enjoy the refreshing taste of homemade Hard Cider and the pride of crafting it yourself. Cheers!
