
How to Make Wine

TL;DR: Ever wondered how to make wine at home? With Craft a Brew’s Wine Making Kit, it’s never been easier! Our kit provides everything you need to craft a gallon of high-quality homemade wine—from vineyard-pressed grape juice to fermentation essentials. In just four weeks, you’ll transform simple ingredients into five bottles of delicious wine, perfect for sipping, gifting, or aging.
Unlike store-bought wine, making your own lets you control ingredients, customize flavors, and experiment with styles like Cabernet Sauvignon, Merlot, Chardonnay, Pinot Grigio, or Moscato. Whether you prefer a dry red, crisp white, or lightly sweet wine, our step-by-step guide ensures success every time.
This blog post walks you through what you’ll need to get started, the complete step by step process, FAQs, tips for personalizing your wine & includes a complete video tutorial, too! Ready to become a home vintner? Let’s get started! 🍷
Getting Started with Homemade Wine
Curious about how to make wine at home? With Craft a Brew’s Wine Making Kit, you can easily transform high-quality grape juice into delicious homemade wine with just a few simple steps. Whether you’re a first-time vintner or an experienced homebrewer, our all-in-one kit helps you make wine with great results with minimal hands-on time. In just four weeks, you’ll be able to sip and enjoy your very own handcrafted wine.
This guide will take you through the entire process of how to make wine, from selecting your ingredients and equipment to fermenting, clarifying, and bottling your wine. We’ll also provide troubleshooting tips for how to make your own wine at home & answer FAQs like “how can I make wine sweeter?” and “how do you make wine with a higher ABV?”. By the end of this post, you’ll know exactly how to make wine from fruit and ho
Wine has been enjoyed by civilizations for over 8,000 years, dating back to ancient Mesopotamia, Egypt & Greece. Throughout history, winemaking has been both a household craft and an industrial pursuit. From the vineyards of France and Italy to small family-owned wineries, the practice of winemaking is deeply rooted in tradition. Making wine at home allows you to participate in this ancient art, bringing a sense of history and craftsmanship to every bottle you create.
With modern advancements, home winemaking has never been easier. Using our Craft a Brew Wine Making Kit, you can now create your own wine from world-class vineyard juice, right in your kitchen, eliminating the need for specialized vineyard equipment or large fermentation spaces.
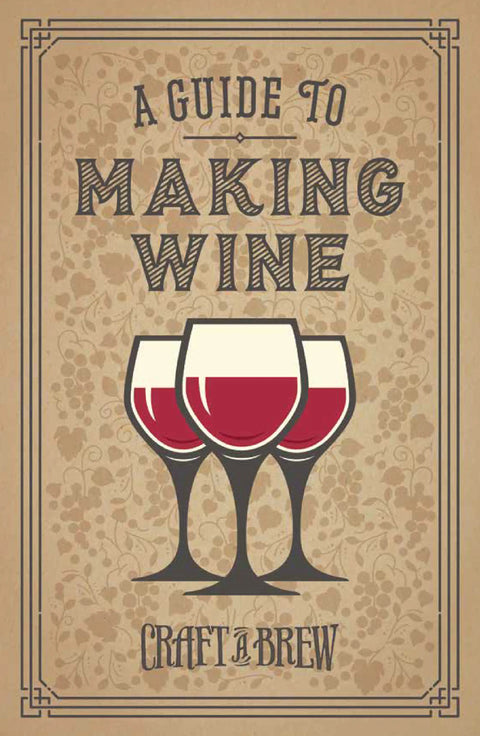
Download Our Guide to Making Wine
Want a step-by-step tutorial for how to make wine? Download our Guide to Making Wine for expert tips, troubleshooting solutions, and advanced techniques to perfect your homemade wine.
Ingredients You’ll Need To Make Wine
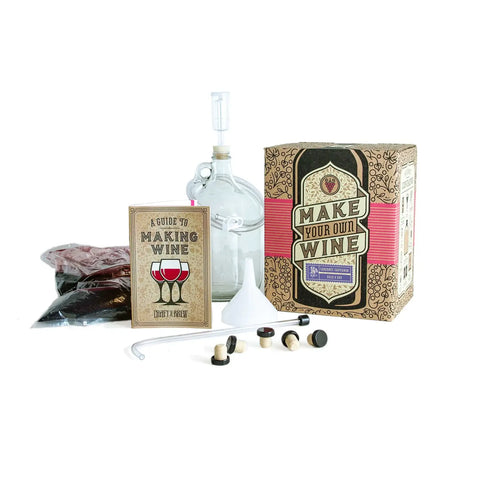
Making wine at home is a rewarding and enjoyable process, and having the right wine ingredients to ensure success. With Craft a Brew’s Wine Making Kit, everything you need to create a one-gallon batch of high-quality homemade wine is included. Whether you prefer an oaky Chardonnay, a bold Cabernet Sauvignon, or a sweet Moscato, our kit makes it easy to get started. Below, we’ll break down the essential ingredients required to make wine at home:The base of your homemade wine. Craft a Brew offers a variety of styles to choose from: Moscato, Cabernet Sauvignon, Merlot, Chardonnay or Pinot Grigio.
A natural clay used during fermentation to prevent cloudiness, ensuring a clear final product.
- A specially selected strain of wine yeast that converts the grape juice’s natural sugars into alcohol.
- Essential for stabilizing wine and preventing unwanted fermentation during aging. These compounds also protect against bacteria and oxidation.
A clarifier used to help sediment settle and improve wine clarity for a brilliant, bright final product.
Essential Equipment
To make wine at home, you'll need the right tools to ferment, transfer, and bottle your wine properly. Our Wine Making Kit includes everything you need to get started (with the exception of wine bottles):The primary vessel where your wine ferments over the course of four weeks.
Allows you to easily transfer wine from one container to another while avoiding sediment
Helps pour juice and other ingredients into the fermenter without spills.
Creates an airtight seal in the fermenter.
Used for siphoning and transferring wine while leaving sediment behind.
A device that allows CO₂ to escape during fermentation while keeping contaminants out.
Used to seal your bottled wine for proper storage and aging.
Once fermentation is complete, you’ll need glass wine bottles for storing and aging your wine. You can reuse wine bottles that you drink at home, which is a great way to recycle and reduce waste! Or you can purchase a set of new ones. Just be sure to AVOID using champagne style bottles or twist off style bottles, which are not compatible with the corks included in this kit.
This handy tool measures the specific gravity of your wine, allowing you to track fermentation progress and alcohol content. Take a reading before fermentation and another after fermentation to calculate the precise ABV of your wine!
Step-by-Step Wine Recipe
Making wine at home is a fun and rewarding process that allows you to create a delicious, high-quality wine right in your kitchen. With the Craft a Brew Wine Making Kit, the process is simple and beginner-friendly. This guide will walk you through the key steps of fermenting, clarifying, and bottling your homemade wine.Follow this step-by-step wine recipe to make your own wine at home in just four weeks.Fermentation is where the magic happens—this is when the yeast converts the natural sugars in the grape juice into alcohol. Before beginning, it’s essential to properly sanitize all of your equipment to avoid contamination.
Mix half of the included sanitizer packet with water in a clean bucket or pitcher.
Soak the jug, funnel, airlock, and rubber stopper for at least 60 seconds. Let them air dry on a clean paper towel.
Pour 1 cup of warm water into the sanitized jug.
Add the Bentonite powder and swirl to dissolve. This helps prevent cloudiness in the finished wine.
Using the funnel, pour the vineyard-pressed grape juice into the jug.
If making Moscato, only use the larger juice pouch at this step. Reserve the smaller Moscato juice pouch for later.
Rinse out the juice pouch with a little water, shake, and pour the remaining contents into the jug.
Fill the jug with cool water until it reaches the one-gallon mark.
If your kit includes oak, add now for extra flavor and complexity. Our Pinot Grigio & Moscato wine recipe do not include oak per their style.
Insert the rubber stopper into the jug’s opening.
Cover the hole in the stopper with your clean thumb and shake the jug vigorously for 30 seconds to mix everything thoroughly.
Remove the stopper and sprinkle the yeast directly into the jug. Fermentation will begin in ~12+ hours.
Insert the airlock into the stopper and place it back into the jug.
Remove the airlock cap, fill it with water to the fill line, and replace the cap.
Place the jug in a cool, dark place with a consistent temperature of 70-75°F (21-25°C).
Allow the wine to ferment for 14 days out of direct sunlight.
After two weeks, fermentation will be complete. At this stage, the wine will be full of CO₂ bubbles, and sediment will have settled at the bottom. The next steps help remove unwanted gas, clarify the wine, and ensure it’s smooth and drinkable.
Place your carboy on a high surface (countertop or chair). Place a clean pot that can fit a gallon of liquid on the at a lower level ( the ground or on a chair) and use the racking cane and transfer tubing to siphon the wine from the jug into the pot.
Keep the siphon tip above the sediment at the bottom of the jug to avoid transferring solids.
Dump out the remaining sediment and rinse the jug with warm water.
Avoid using soap, as it can leave behind residues that affect flavor.
Use the siphon to transfer the wine back into the cleaned jug, leaving sediment behind.
Stir the wine vigorously for 5 minutes with the racking cane to remove CO₂.
Proper degassing ensures a smooth, non-fizzy final product.
Stir in the Potassium Metabisulfite & Potassium Sorbate for 3 minutes to prevent further fermentation and oxidation.
Add Chitosan and stir for another 2 minutes to help clarify the wine.
If making Moscato, let the wine sit for 24 hours before adding the reserved juice pouch.
This prevents fermentation from restarting when the sweet juice is added.
Fill the jug with filtered or spring water up to the one-gallon line if needed.
Reinstall the airlock and let the wine sit for 14 more days to continue clarifying.
Your wine is now clear, stable, and ready to bottle!
Sanitize bottles, corks, transfer tubing, and funnel with the remaining sanitizer packet.
Use the siphon to transfer the wine into five standard 750mL bottles, leaving about ½ inch of space at the top.
Avoid transferring any remaining sediment at the bottom of the jug.
Insert the included corks - no corker required!
Store bottles upright and NOT on their side.
You can drink your wine immediately, but it will improve with age.
For best results, allow your wine to age for at least 2-4 weeks before enjoying.
Store bottles in a cool, dark place and consume within 6 months.
Watch Our Wine-Making Video
See this wine recipe in action in our Wine Making Video! This video is an accompaniment to our 1 gallon Wine Kit. We’ll walk you through every step listed above to walk you through making a Chardonnay using our complete wine recipe.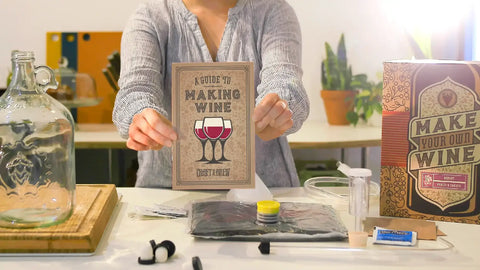
Troubleshooting and Expert Tips
Making wine at home is a fun and rewarding experience, but sometimes unexpected challenges arise. Whether you're dealing with sediment, foam overflows, or wondering how long your homemade wine will last, we've got you covered. Below are some of the most common wine making FAQs and expert troubleshooting tips to help ensure a smooth and successful fermentation process.Each batch of homemade wine yields one gallon, which fills five standard 750 mL bottles.
Our Wine Making Kit includes everything you need to make wine, including vineyard-pressed grape juice, yeast, and all necessary additives and equipment.
The only item you need to source is five 750 mL wine bottles.
Don’t worry—you have four weeks before bottling day to collect bottles from wines you enjoy or purchase new ones.
Your homemade wine will finish at approximately 14% ABV (alcohol by volume).
The exact ABV can vary slightly based on fermentation temperature, yeast activity, and other factors.
If you’d like to measure your wine’s exact alcohol content, you can use a hydrometer.
Take a sample before adding yeast and another before bottling.
Compare these readings to calculate the ABV.
Yes! While we recommend using your Wine Kit within 18-24 months for the best results, the components don’t technically expire. As long as your kit has been stored in a cool, dry place and has not been exposed to moisture or heat, the ingredients should still be effective.
If your kit has been in storage for a while, you may notice natural sediment settling inside the juice pouch—this is completely normal.
Before starting, gently massage the juice pouch to loosen any settled deposits.
Clarifiers added throughout the process will remove any lingering sediment.
If you prefer to start fresh, you can purchase our Wine Recipe Kit, which provides fresh ingredients while allowing you to reuse your existing equipment.
Our Wine Kit includes Chitosan, a natural clarifier derived from shellfish. However, the way it’s processed ensures that all proteins from the shells are fully degraded.
If you’d like to make vegan-friendly wine, you can simply omit the Chitosan.
Instead, allow your wine to sit a few extra days (beyond the standard timeline) to naturally clarify.
This will give the sediment more time to settle to the bottom before bottling.
Omitting this clarifier will not impact flavor—it just requires a little more patience.
Nope! This is completely normal. The vineyard-pressed grape juice is packaged in oxygen-barrier material to keep it fresh.
Once mixed with water on Day 1, it will lighten in color.
Throughout the fermentation process, clarifiers will remove natural sediment and further brighten the wine.
If making Chardonnay, oak chips may initially darken the appearance, but this will settle over time.
If fermentation is especially active, some wine and foam may bubble up into the airlock. Don’t worry—your wine will still be fine! Simply remove the airlock, rinse it out, and refill it with fresh water before reinstalling it. Check the fermentation temperature—if your room is above 75°F, yeast may be too active, causing excessive foam. Try moving the fermenter to a cooler spot.
If foaming persists, switch to a "blow-off tube" setup: Insert one end of the flexible tubing into the rubber stopper. Place the other end into a glass of water. This acts as a temporary airlock until fermentation calms down.
Our Wine Kit includes corks, which work best with standard 750 mL wine bottles.
You can reuse bottles from store-bought wine or purchase our Wine Bottling Kit.
Twist-off wine bottles can also be used with their original caps.
Sediment is completely normal! Even though the clarifiers remove most solids, some small particles may still settle in the bottle over time.
To avoid pouring sediment into your glass, pour slowly and steadily, leaving the last inch of wine in the bottle.
If sediment does end up in your glass, don’t worry—it’s harmless and won’t affect flavor.
We recommend drinking your wine within 6 months for the best flavor.
Unlike commercial wines, homemade wines aren’t designed to be aged for years.
However, red wines may improve slightly if aged for a few additional months.
Store bottles in a cool, dark place, away from direct sunlight or temperature fluctuations.
For more troubleshooting tips and expert advice, visit our Wine Making FAQs:
Customize Your Wine
One of the best things about making your own wine is the ability to customize it to your taste. Even if you’re using our Wine Kit, with pre-measured ingredients, you can still experiment with unique flavors and make your homemade wine truly one-of-a-kind. Here are some simple ways to enhance and personalize your wine:- If your wine turns out too dry, you can add a touch of sweetness before bottling. Because our Wine Kit includes stabilizers to prevent fermentation in bottles, you can safely add sugar before bottling. Dissolve anywhere from ¼ cup to ¾ cup of white table sugar in a small amount of warm water and mix it into the wine before bottling to incorporate. IMPORTANT: To prevent yeast from fermenting this sugar in bottles, which can be dangerous, be sure NOT to skip the clarifying steps when potassium sorbate & potassium metabisulfite are added to the wine.
- While the kit includes powdered oak, you can swap this out for an oak infusion spiral or oak chips for more depth and complexity. You can choose a specialty wood, like French Oak, American Oak, Brazilian Oak, Sugar Maple or even a super charred oak. This method mimics the aging process of barrel-aged wines, adding vanilla, caramel, and toasted wood flavors.
- Transform your homemade wine into a delicious sangria by mixing it with fresh fruit, orange liqueur, brandy, and a splash of soda. This is a great way to experiment with flavors and impress guests at gatherings.
- For a fun seasonal twist, try infusing your wine with cinnamon sticks, star anise, cloves, or vanilla beans. This works especially well with red wines, creating a mulled wine flavor that’s perfect for cooler months.
Why Make Your Own Wine?
Making your own wine at home isn’t just about the final product—it’s about the experience, creativity, and satisfaction that come with crafting something from scratch. Whether you're a wine lover looking for a new hobby or simply want to customize your perfect bottle, there are plenty of reasons to try home winemaking.
- Customizable Flavors – Want a dry, crisp white or a bold, oaky red? Prefer a touch of sweetness or unique infusions like fruit, spices, or oak aging? When you make wine at home, you have the freedom to fine-tune flavors to match your personal taste.
- Fun & Rewarding DIY Experience – There’s something deeply satisfying about fermenting your own wine and pouring a glass that you crafted yourself. Plus, it’s a great learning experience—you’ll gain insight into the winemaking process, from fermentation to bottling.
- Affordable & Cost-Effective – Once you have the equipment, making your own wine can be a cost-effective way to enjoy high-quality vino. With each batch yielding five bottles of wine, you’ll be saving money while still enjoying premium flavors.
- Great for Gifts & Special Occasions – There’s nothing more personal than gifting a bottle of homemade wine to family and friends. Customize the labels, experiment with different flavors, or create special bottles for holidays, weddings, and celebrations.
- Connect with an Ancient Tradition – Winemaking has been a part of human history for over 8,000 years, spanning cultures and civilizations. By making your own wine, you’re connecting with one of the oldest and most cherished traditions in the world of food and drink.
With Craft a Brew’s Wine Making Kit, making wine at home has never been easier. Whether you’re a beginner or a seasoned homebrewer, this kit simplifies the process while still offering endless opportunities for creativity. Ready to uncork your own adventure? Get started today!
- Healthier Ingredients: Control the amount of sugar and avoid artificial additives.
- Customizable Flavors: Create a Wine that perfectly suits your taste preferences.
- Fun and Rewarding: Enjoy the process of crafting your own beverage from scratch.
Simplify the Process with the Craft a Brew Wine Making Kit
Making wine at home is easy. We make it even easier with our complete Wine Starter Kit, which includes everything you need to get started and has simple instructions designed to make your first time a breeze. Our Wine Starter Kit helps you craft a gallon of wine with vineyard-source grapes in just 4 weeks.
Enjoy Your Homemade Wine
With Craft a Brew's easy recipe, making your own Wine has never been simpler. Enjoy the refreshing taste of homemade Wine and the pride of crafting it yourself. Cheers!
