
How to Brew New England IPA
TL;DR: New England IPA (NEIPA) is a hazy, juicy, and aromatic beer style that has taken the craft beer scene by storm. Unlike traditional IPAs, NEIPAs emphasize tropical and citrus-forward hop flavors with minimal bitterness. If you're wondering, "How can I make IPA at home?" this guide will walk you through the step-by-step brewing process.
With the Craft a Brew New England IPA Kit, you can brew your own NEIPA with ease. Whether you're a beginner or an experienced homebrewer, our IPA brewing kit includes all the ingredients and equipment you need to craft a high-quality, hop-forward beer right in your kitchen.
- Overview
- Download The Guide
- What You’ll Need to Make IPA
- Step-by-Step IPA Recipe
- Watch the Video
- Troubleshooting & Tips
- Customize Your IPA
Getting Started with Brewing a New England IPA
We all remember our first sip of a New England IPA. The NEIPA beer took the craft beer world by storm in the 2010’s with its signature hazy appearance, juicy flavor, and smooth mouthfeel. In a landscape of amber IPAs with intense bitterness and crystal clear appearance,, the New England style IPA had everyone asking “how do I make IPAs like this?” Unlike traditional IPAs, NEIPAs focus on tropical and citrus-forward hop flavors while minimizing bitterness. The style relies on generous dry hopping, flaked oats for haze and mouthfeel, and careful yeast selection to create a balanced, aromatic brew.
Wondering “how can I make IPAs that are heavy on the haze and light on the bitterness?” Craft a Brew is here to help you learn how to brew New England IPA in your kitchen! You don’t need a professional setup to make IPA the New England way — just the right ingredients, equipment, and a simple step-by-step process. With a Craft a Brew New England IPA Kit, you can easily brew your own NEIPA at home, whether you’re a first-time homebrewer or an experienced brewer looking to perfect the hazy, fruit-forward style.
In this guide we’ll show you how to brew New England IPA at home, covering everything from ingredients to fermentation, dry hopping, and bottling. Whether you're new to brewing or a seasoned pro, this guide will help you learn how to brew your own New England IPA and enjoy fresh, homemade IPA anytime you want.
Download Our Guide to Making IPA
Grab our Guide to Making IPA for a complete breakdown of the brewing process, tips, and troubleshooting advice. These complete instructions will teach you how to brew New England IPA style beers at home, from brew day to bottling day.
What You’ll Need To Make New England IPA
The key to brewing New England IPA at home is the right IPA ingredients, equipment and technique. We’ll cover the key New England IPA ingredients you’ll need to craft your own hazy, pillowy IPA.
Ingredients
Using the right New England IPA ingredients is crucial for brewing this signature style. The hallmark of a great NEIPA is its cloudy appearance and smooth mouthfeel, which come from a high-protein grain bill that typically includes flaked oats or wheat. In addition to the grain bill, a heavy dose of dry hops is essential. Dry hop additions refer to hops that are added during fermentation (instead of during the boil). Dry hopping extracts flavor and aroma from the hops instead of harsh bitterness that hops release during the boil. Hop varieties with fruity character, like Mosaic, Citra, and Simcoe, are popular choices. A low-attenuating yeast strain, such as S-04 English Ale yeast, plays a key role in creating haze in a NEIPA. Attenuation refers to the amount of sugar a yeast leaves unfermented. Low attenuating yeast leaves more residual sugar and body in the beer, which is a signature of the NEIPA. Bonus points if your yeast also provides fruity esters, like S-04, for enhanced juicy character.Our New England IPA recipe uses Pilsen Dry Malt Extract for the base fermentable sugars. We also use specialty grains to create the signature hazy appearance and smooth body you expect from a NEIPA: Carapils (for head retention), Honey Malt (for sweet malt flavor) & Flaked Oats (for haze and protein).
The best New England IPAs typically use fruit forward hop varieties. Tropical, citrusy, stone fruit, you name it. Our New England IPA uses Mosaic (pineapple, mango and passion fruit notes), Citra (prominent citrus notes) & Simcoe (fruity, berry & stonefruit notes). All hops should be added AFTER the boil to maximize their fruity character.
Our New England IPA kit includes SafAle S-04 dry ale yeast. This strain exhibits low attenuation, meaning the yeast cells leave more residual sugar in the finished beer. This contributes to a full body and smooth mouthfeel. Dry yeasts are excellent choices for homebrewing NEIPAs because they’re shelf stable and don’t require refrigeration like liquid yeasts.
If you want to take your NEIPA to the next level, consider these IPA ingredients:
- Calcium Chloride: Water chemistry is important. If you have soft water, this additive helps harden the water and create a fuller, sweeter profile.
- Calcium Sulfate: Minerals present in tap water and spring water are important for fermentation. This ingredient helps add minerals back to Reverse Osmosis water or soft water. It also enhances hop character in a beer!
- Lactose: If you want to make any NEIPA a Milkshake NEIPA, just add Lactose! This milk-derived sugar adds heft and smoothness to the beer. Because it’s non-fermentable, yeast can’t “eat it,” leaving a slight sweetness in the beer.
Equipment
To brew your own New England IPA, you’ll use the same essential equipment you’d use to brew any other ale! New to homebrewing? Our 1 gallon New England IPA making kit has everything you need to get started!You’ll need a stock pot that can fit as close to a full gallon of liquid as possible. You’ll need a few inches of room to prevent boil overs. Don’t use too large a pot - this can increase evaporation rates and result in volume loss. Your pot should have a lid, which is used when chilling the beer before pitching the yeast.
It’s important to closely monitor and maintain temperatures at different points in the brewing process. Our New England IPA making kit includes a glass lab thermometer, but you can use any food-safe thermometer, like a digital thermometer! Key temperatures your thermometer must reach are 155ºF and 75ºF.
A funnel helps you transfer the wort (unfermented beer) from your stock pot into the carboy. A 4” funnel is included in our New England IPA making kit.
A 1 gallon carboy is where yeast turns the wort (unfermented beer) into a New England IPA. A rubber stopper plugs the neck to maintain a proper seal. A carboy is included in our New England IPA making kit.
A racking cane is a rigid plastic tube that is submerged into your beer to start a siphon transfer. Siphons reduce oxidation and help lift your fermented beer up off of sediment and into bottles. A racking cane is included in our basic New England IPA making kit.
After fermentation, you’ll need to carbonate your beer in bottles. You can use flip top bottles, like Grolsch style bottles, or you can use pry-off beer bottles, caps and a capper tool. You’ll need roughly ten 12oz bottles per gallon of beer. That’s about eight 16oz bottles per gallon or four 32oz bottles per gallon.
When working with high volumes of hops, a nylon hop straining bag is highly recommended on brew day. Keeping hop sediment contained helps improve the overall clarity in your New England IPA. Keeping hop matter out of the fermenter and out of your bottles improves the overall flavor of your IPA.
Step-by-Step Brewing Guide
Brewing your own New England IPA at home is a fun and rewarding process, and with the Craft a Brew New England IPA Kit, it’s easier than ever. This step-by-step guide will walk you through the New England IPA brewing process, from sanitizing your equipment to fermenting and bottling your beer. Follow along and learn how to brew New England IPA at home with confidence.Step 1: Sanitize Everything
Before you begin brewing, proper sanitation is critical. Any bacteria or wild yeast can ruin your beer. Mix half of the included sanitizer packet with 1 gallon of water in a bucket or pitcher. Submerge all equipment that will touch the beer after boiling (fermenter, funnel, airlock, tubing, thermometer). Let everything soak for at least 60 seconds. No need to rinse—just let the sanitized equipment air dry on clean paper towels.
Step 2: Heating the Water & Steeping the Grains
Pour as close to a gallon of water as possible into your brew pot while leaving a few inches of space to prevent boil-overs.
Heat the water on high heat until it reaches 155°F (68°C).
Place the specialty grains (Carapils, Honey Malt, Flaked Oats) into the grain steeping bag, tie it off, and steep in the water for 20 minutes.
Remove the grain bag and discard—do NOT squeeze it, as this can release tannins and create unwanted bitterness.
Step 3: Boiling & Adding Malt Extract
Increase the heat and bring the wort (unfermented beer) to a boil.
Once the first bubbles appear, remove the pot from heat and slowly stir in the dry malt extract to prevent clumping.
Return the pot to medium-high heat to maintain a gentle rolling boil. Set a 20 minute timer. After 20 minutes, turn off the burner and remove the pot from heat.
Step 4: Hopstand
Place the thermometer in the pot to monitor temperature. Wait until the wort naturally cools to 180ºF. Once it does, add all 3 hop packets labeled “Hopstand” to the wort.
Set a 30 minute timer. During this “hopstand,” the hops will slowly release their flavor into the wort. No need to maintain the 180ºF temperature - it will naturally cool during this 30 minute hopstand.
Step 5: Cooling the Wort
After the 30 minute hopstand, the wort must be cooled to a yeast-friendly 75ºF temperature before fermentation can begin.
Create an ice bath in your sink using ice and cold water.
Place the pot in the ice bath and cover it with a lid to avoid contamination.
Stir the surrounding ice water occasionally to speed up the cooling process.
Use a sanitized thermometer to check that the wort is below 75°F (23°C).
Step 6: Transferring to the Fermenter & Pitching Yeast
Using a sanitized funnel, transfer the cooled wort into the sanitized fermenter, leaving any thick sediment (trub) behind.
If needed, add cool water to reach the "one-gallon" fill line.
Cut open the yeast packet and pitch the yeast (sprinkle the entire contents into the fermenter).
Aerate the wort by sealing the fermenter and shaking it vigorously for one minute. This helps the yeast thrive.
Step 7: Setting Up the Blow-Off Tube & Monitoring Fermentation
Insert a sanitized blow-off tube into the fermenter’s rubber stopper. Place the other end in a half-full glass of water. This prevents foam overflow.
Place the fermenter in a dark, temperature-stable location (ideally 60-75°F).
Within 24-48 hours, you should see bubbling activity as fermentation begins.
Step 8: Swapping the Blow-Off Tube for an Airlock
After 4-5 days, once bubbling slows down, swap the blow-off tube for an airlock filled with water.
Fermentation will continue for about 10-14 days.
Step 9: Adding Dry Hops for Maximum Juiciness
Dry hopping enhances the aromatic punch of your New England IPA.
After 4 days of fermentation, add the first packet of dry hops directly into the fermenter. No need to stir or mix - the hops will add flavor & aroma on their own.
After 10 days of fermentation, add the second packet of dry hops directly into the fermenter. No need to stir or mix - the hops will add flavor & aroma on their own.
Step 10: Preparing Bottling Equipment & Priming Sugar
Sanitize bottles, caps, siphon tubing, and the bottling wand.
In a stockpot, heat 1.5 cups of water with 2 Tablespoons of sugar. Stir until dissolved and boil for 5 minutes.
Allow the sugar water (priming sugar) to completely cool before using.
Step 11: Siphoning Beer into Bottles
Place the fermenter on a high surface and the pot of priming sugar on the floor.
Siphon the beer into the pot, carefully leaving sediment behind.
Gently stir the beer to evenly mix in the priming sugar.
Using sanitized tubing, siphon the beer into bottles, filling just to the neck. Cap the bottles.
- Day 15 - 28: Carbonation
Step 12: Carbonation & Aging
Store bottles in a dark, temperature-controlled area (68-75°F) for two weeks to allow carbonation to develop.
After 14 days, refrigerate and enjoy your homebrewed New England IPA!
Pro Tip: If your beer is under-carbonated, let it sit at room temperature for an additional 3-5 days before chilling.
Watch Our IPA-Making Video
See our beer kits in action! Learn how to brew your own New England IPA by watching our step-by-step beer brewing video. This video serves as a visual aid to this IPA recipe, made using the Craft a Brew IPA making kit.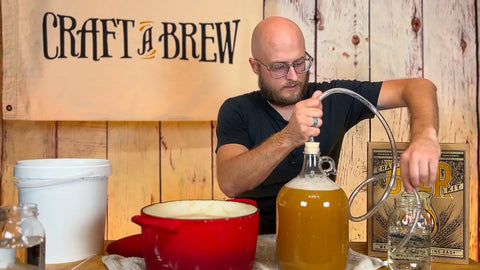
Common Brewing Mistakes to Avoid
Even experienced homebrewers can run into issues when brewing a New England IPA at home. This style requires careful handling of hops, precise fermentation control, and the right ingredient balance to achieve its signature hazy appearance, juicy flavor, and smooth mouthfeel. Below are some of the most common mistakes homebrewers make when crafting this style and how to avoid them. With these precautions in mind, the Craft a Brew New England IPA making kit has everything you need to execute a juicy, hazy treat!✅ How to Avoid It: When transferring beer, use always use a siphon to minimize splashing. Whenever adding hops to your fermenter, work quickly to reduce oxygen exposure time.
✅ How to Avoid It: Focus on late hop additions - AFTER the boil - like “whirlpool,” “hopstand,” or “dry hop” additions. Adding hops to the hot wet boil will extract bitter alpha acids from the pellets. Reserve all hop additions for after the boil or during fermentation to maximize their fruit-forward flavors and to bypass the bitterness.
Tips for Successful Homebrewing
Here at Craft a Brew, our kits and instructions are designed to produce great beer on your very first try. But if you really want your first New England IPA to impress, here are some simple tips for brewing hazy IPA like a pro:Fermentation temperature can make or break your IPA, affecting both flavor development and yeast health. Avoid temperature swings, as they can cause off-flavors or a stalled fermentation. There’s a saying that “brewers make wort, but yeast make beer.” It’s true! Be sure to give yeast the optimal environment and your beer will be better for it.
Oxidation is undesired in any beer, but New England IPAs are extremely sensitive to oxidation, which can cause hazy beers to turn brown and develop cardboard-like flavors. The best ways to reduce oxidation risk include: avoid splashing and excessive movement when transferring wort or bottling and using a siphon to reduce beer’s oxygen exposure.
Proper sanitation is one of the most important aspects of homebrewing. Any bacteria or wild yeast contamination can ruin your beer. Sanitize ALL equipment that touches your beer after the boil, including fermenters, airlocks, siphons, and bottles. Use a no-rinse sanitizer (like the one included in our IPA Kit) for convenience. Always rinse out your siphon and tubing immediately after use to prevent buildup.
To become a better brewer, you must learn from past missteps and take pride in your improvements! The best way to monitor your progress and brew better beers is to log everything. Get yourself a simple brew journal and log everything from ingredients and their weights, to dates, temperatures, tasting notes and everything in between.
With a Craft a Brew IPA making kit, you’ll be equipped with the best tools and ingredients to brew the best possible beer. As you begin your homebrewing journey, remember to prioritize these 4 concepts and your homebrews will be successful.
Homebrewing FAQs
Encountering issues? Here are some common New England IPA Making FAQs, tips & solutions to any problem you might have while making your NEIPA.The iconic hazy appearance of a NEIPA comes from the use of high-protein grains like flaked oats and heavy dry hopping. Use flaked oats and honey malt for body and haze retention. Dry hop during active fermentation (around Day 5) to encourage biotransformation. Avoid over-filtering or cold crashing too early, which can clear out the haze.
For the best flavor and yeast performance, ferment your New England IPA at 65–70°F (18–21°C). A stable fermentation temp allows the yeast to produce fruity esters that complement the hops. Too cold = stalled fermentation, muted flavors. Too warm = harsh, boozy off-flavors.
New England IPAs are best enjoyed young and fresh (within 1 - 4 months of brewing). Keep bottles cold (35–40°F) to slow hop degradation. Store away from light and oxygen to prevent off-flavors.
Customize Your New England IPA
Craft a Brew’s IPA making kit comes with everything you need to brew a classic, hazy NEIPA. But you can put your personal creative spin on this beer with simple customizations!Add lactose:
Brew a “milkshake IPA” simply by adding lactose, a milk-derived sugar. This non-fermentable sugar adds some body, heft and slight sweetness to any beer.Add fruit puree:
Our New England IPA making kit includes fruit-forward hops that would taste great with added fruit! Add passionfruit puree for a tart IPA or mango puree for a tropical IPA!Add orange peel or zest:
Add a hint of bright citrus flavor with a dried sweet orange peel or zest your own citrus! Using a grater, zest the skin of a grapefruit, lemon or lime (avoiding the bitter white pith) and add to the end of the boil.Why Make Your Own New England IPA?
If you love brewery hopping and tasting hazy New England IPAs, it’s time to try your hand at making your own! There are plenty of reasons to make your own IPA:
- It’s Easier Than You Think: Many people think brewing beer is difficult, but with the right IPA brewing kit, it’s actually simple and fun. The Craft a Brew New England IPA Kit provides all the equipment, ingredients, and easy-to-follow instructions you need to brew a hazy, juicy NEIPA at home with confidence. No prior brewing experience needed! The process is straightforward with just a few basic steps. You’ll get all the ingredients pre-measured for convenience. Follow our step-by-step brewing guide to ensure success.
- Complete Control Over Flavor & Style: Want a NEIPA bursting with Mosaic and Citra hops? Prefer a touch of piney bitterness alongside the haze? When you brew your own NEIPA, you decide exactly how it tastes. You can adjust the hop schedule, malt bill, or even experiment with fruit additions, dry hopping techniques, or alternative yeast strains to create a beer that’s uniquely yours.
- The Joy of the Brewing Process: Brewing is part science, part art—and completely satisfying. There’s something special about crafting your own beer from start to finish, watching fermentation happen, bottling your brew, and finally enjoying that first sip of something you created with your own hands. If you love to drink beer, there’s nothing more fun than learning the science behind your favorite drink first-hand.
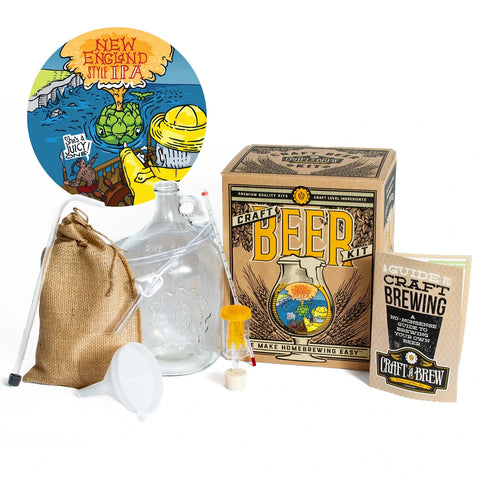
Simplify the Process with the Craft a Brew New England IPA Making Kit
Homebrewing doesn’t have to be complicated! Our New England IPA starter kit simplifies the process, making it perfect for beginners and experienced brewers alike.
