How to Make Kombucha
TL;DR: Make your own kombucha with Craft a Brew’s easy recipe and starter kit! Brew a healthy, tangy drink packed with probiotics using simple ingredients like tea, sugar, and a SCOBY. Follow step-by-step instructions to customize flavors and enjoy the benefits of crafting your own kombucha, from saving money to creating unique blends. With all essential tools and tips included, brewing kombucha at home has never been simpler or more rewarding. Cheers to your homemade fizzy drink adventure!
Getting Started with Homemade Kombucha
If you love drinking kombucha and are curious how to make kombucha at home, look no further. We make kombucha brewing easy and fun with or complete Kombucha Starter Kit! Kombucha is a fermented tea drink with origins dating back to 200's BC China! Kombucha has long been enjoyed for its many health benefits and bold, tangy taste. Every glass is packed with probiotics, acids, enzymes and all kinds of vitamins and minerals which help maintain a healthy and happy gut!
How to make your own kombucha - a quick overview: It all starts with caffeinated tea, sugar and a SCOBY. you brew a batch of tea, sweeten it with sugar, top off with water, add a SCOBY & previously fermented kombucha (also called “starter tea”). The good bacteria, yeast & probiotics in the previously fermented kombucha convert the sweet tea into a tart tangy kombucha in seven to fourteen days.
If you’re wondering “how can I make kombucha that tastes like my favorite brande’ve g?” - we have plenty of recipe ideas, flavor combos and tips for you to brew the best kombucha in your own kitchen and start saving money on your favorite fizzy drink.
Download Our Guide to Making Kombucha
For a complete step by step instructions download our Guide to makingKombucha. We’ll walk you through how to make Kombucha at home with our DIY kit.
Ingredients You’ll Need To Make Kombucha
Quality kombucha ingredients are important for a delicious finished product. Using the right kombucha ingredients and the proper ratios of each is crucial for healthy fermentation!
Kombucha is made by brewing tea, sweetening with sugar, topping with water and adding a kombucha SCOBY and previously fermented kombucha. After fermentation you can add your favorite flavors, fruit or herbs. Here’s a list of kombucha ingredients you’ll need to brew a one gallon batch.
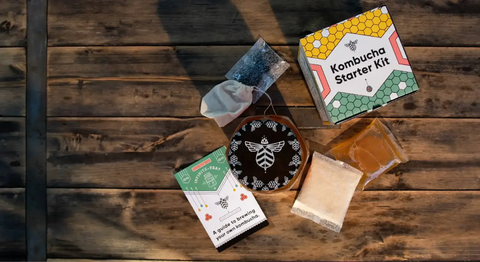
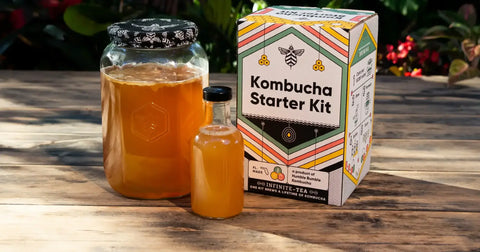
Try our complete Kombucha Starter Kit, which includes all of the ingredients above with an asterisk! Organic tea and sugar and a fresh grown SCOBY and starter tea - all packaged and pre-measured for a smooth first experience.
SCOBY: An acronym that stands for Symbiotic Colony Of Bacteria and Yeast. It’s sometimes called a pellicle, the “mother,” the culture. A SCOBY is a cellulose mass of yeast and bacteria that promote fermentation and provide a protective layer at the surface of the fermenter. A SCOBY is a byproduct of the fermentation process and looks like a slimy pancake. Every time you make a batch of kombucha a new SCOBY will grow! It will vary in texture, color, opacity and shape each time, but will grow to fit the shape of your fermenter.
Our Kombucha Kit includes a SCOBY packaged with starter tea.
You’ll need 1-2 cups of liquid starter tea for a one gallon batch of kombucha. A SCOBY alone will not ferment your kombucha. A SCOBY works in tandem with starter tea, which is simply previously fermented kombucha. Starter tea is considered the real driver of fermentation and is one of the most important kombucha ingredients. After you ferment a batch of kombucha you must reserve 1-2 cups of it to use in your next batch. Using too little starter tea can result in a weak fermentation and can even leave your batch susceptible to mold. A strong starter tea is key for brewing kombucha at home.
Our Kombucha Starter Kit includes strong starter tea to help you ferment your first batch. Once you ferment your first batch, you’ll reserve 1-2 cups to start your second batch!
Sugar is an important kombucha ingredient. You should use true sugar in the form of white table sugar, cane sugar or raw sugar. Many new brewers have concerns about sugar content, but remember that this sugar is food for the kombucha! You should not reduce sugar content or use sugar substitutes or sugar alternatives. Proper ratios of sugar are crucial for healthy fermentation. Remember - this is fuel for your SCOBY!
We advise against using honey, agave or maple syrup. These sugars have high water content and may not provide your SCOBY with enough food. You should also avoid artificial sweeteners (like Splenda or Equal) or sugar alternatives (like coconut sugar). Using too little sugar or a sugar alternative can actually starve your SCOBY.
Our Kombucha Starter Kit includes 1 cup of organic cane sugar.
You’ll need 6 teaspoons of loose leaf tea or 6 tea bags for a one gallon batch of kombucha.
In order to brew kombucha you must use real tea - Camellia sinensis. All true tea comes from this single plant species. Real, caffeinated tea includes: black tea, oolong tea, green tea, white tea and Pu-erh tea. All of these teas come from the Camellia sinensis plant and are the types of teas that kombucha needs to thrive. Real tea has caffeine, polyphenols and tannins that provide nutrients for fermentation. The yeast & good bacteria in the SCOBY “eat” these nutrients.
Which tea is best? We personally recommend brewing with black tea, at least for your first fermentation. Black Tea naturally has more polyphenols than other teas, which provides your first batch with a feast of nutrients for a healthy foundation to your kombucha hobby. After your first fermentation, you can use other types of tea, like white tea, or a blend, like black and green tea.
You should not use herbal teas or flavored teas to brew kombucha, which lack necessary nutrients for fermentation. Herbal teas like chamomile tea, mint tea or dandelion tea are not suitable kombucha ingredients. Flavored teas often contain oils, flavors or spices that should not come into direct contact with your SCOBY.
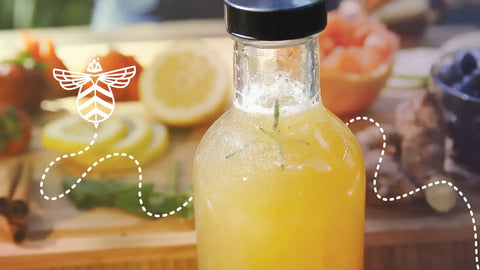
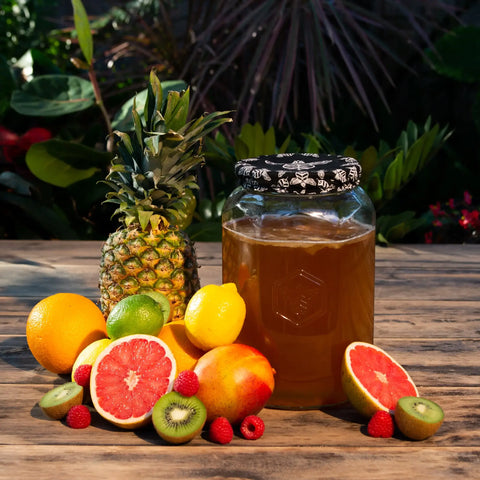
After fermentation you can get creative with your kombucha flavors in bottles! Not only does fruit add flavor to your kombucha, but it provides sugar to naturally carbonate your kombucha in bottles! You can use whole fruit, like apples, berries or peaches. We recommend slicing, dicing or grating to release more juice and increase surface area for the best possible flavors. You can use bottled or fresh squeezed juice, think cranberry, kiwi or lemon. You can also use herbs, like basil, sage or mint. Add spices, like cinnamon, cardamom or turmeric. You can also add other ingredients like chia seeds, hibiscus flowers, pumpkin puree, sliced ginger or jalapeno peppers!
Essential Equipment
Homemade Kombucha requires a few basic tools. You’ll need a one gallon fermentation jar with a wide mouth, a cloth cover for the jar, bottles & a funnel. While not required, we find that pH Testing Strips and a Heat Wrap also help you brew the best possible kombucha at home. If you're new to at home fermentation and need a fermenter, try our Deluxe Kombucha Making Kit!Our Kombucha Making Kit includes a one gallon glass jar with handy features, like a tapered jar lip for easy pouring and volume markers for quick measuring.
Kombucha fermentation requires oxygen exposure and open air flow. Oxygen is an essential part of the process of turning sweet tea into tangy booch. This is why a wide mouth jar is used instead of a traditional carboy, rubber stopper and airlock.
A tight weave cloth cover lets oxygen through the jar, while keeping dust or fruit flies out of the fermenter. Our Kombucha Making Kit includes an elastic cloth jar cover that’s easy to install and remove as needed. But you can also use other tight weave, yet breathable fabric or material, like a bandana, a tea towel or a coffee filter. Cheesecloth is not recommended as a jar cover - the loose weave will allow fruit flies and other particles to pass through.
You’ll need eight 16 oz bottles (or ten 12 oz bottles) with air tight caps or seals to store your gallon of kombucha. Kombucha won’t carbonate in the fermenter, but will carbonate when sealed in bottles with some fruit. We personally recommend “Stout” style bottles with polyseal caps, like our Kombucha Bottling Kit. The easy twist caps allow you to check on carbonation and the wide opening is perfect for adding fruit. You can also use flip top bottles or Grolsch style bottles.
A funnel is a helpful tool for transferring your kombucha into bottles with less mess.
These handy test strips help you brew more consistent tasting kombucha. They are NOT required to brew kombucha, but pH readings can help you better understand and track the fermentation process. pH strips won’t tell you that your kombucha is “done” fermenting or ready to bottle - your taste buds do that for you. But pH readings help you dial in your ideal fermentation timeline that produces kombucha that is as tart as you want it.
A stable, warm fermentation temperature is crucial for kombucha fermentation. WIth a heat wrap, you can maintain the proper temperature and brew more consistent kombucha. Cold fermentation temperatures can slow the fermentation process and cause mold growth. A heat wrap is useful year round, but especially in colder winter months or cold environments.
Step-by-Step Kombucha Recipe
Once you gather your kombucha ingredients and equipment, it’s time to start brewing! Here’s our step by step kombucha recipe for a one gallon batch.One of the most important steps in this process is properly cleaning your equipment in a way that protects against wild bacteria while still preserving the good bacteria needed for fermentation. Use warm water & soap that is NOT antibacterial (most dish soaps work) when washing your jar, cloth, bottles & other equipment. NEVER pour boiling water into the glass jar.
- Bring 4 cups of water to a boil in a pot. Once a boil is achieved, remove from heat. You can also use an electric kettle to boil water if you'd prefer. Let cool for 2 minutes.
- Add tea to the drawstring bag and steep in the pot of hot water for 15 minutes.
- Give the tea a good squeeze before discarding the leaves.
- Add sugar to the pot of hot tea and stir to dissolve. Let cool to room temperature.
- Once sweetened tea reaches room temperature, pour it into the glass brewing jar. If using a jar with a valve, make sure it is closed before filling. NEVER pour boiling hot liquid into the glass jar.
- Add SCOBY and starter tea to the jar. Add cool water until you reach the 1 gallon fill line. 7. Place the elastic cloth cover on the jar.
Kombucha needs to ferment out of direct sunlight at a temperature between 75-85°F with access to plenty of fresh air (no closets or cabinets) for 7 - 14 days. Here are a few important tips:
- Temps below 75°F can leave your booch prone to mold growth, so insulate the jar with a towel, blanket or a heat wrap if need be.
- Be sure to ferment away from house plants, produce, trash or compost.
- Your first few batches can benefit from a longer fermentation - this helps create strong starter tea.
- A shorter 7 day fermentation yields sweeter kombucha (more residual sugar will remain). A longer 14 day fermentation yields more tart kombucha (less residual sugar will remain).
- We recommend tasting with a clean spoon on day 7. If using a jar with a valve, you can sample from the spout instead. If you like the flavor, proceed to bottling. If you prefer it more tart, continue fermenting and tasting daily until it's just right.
- Your SCOBY will grow and change during fermentation. If you have concerns about its appearance review our FAQs online (scan the QR code) or email us at support@craftabrew.com before discarding anything!
Before bottling or adding any flavor you need to remove your SCOBY(s) from the jar and set aside. The SCOBY will have grown to fit the jar and may have multiplied, the layers may or may not be attached. You’ll also need to reserve 1-2 cups of kombucha - this is starter tea for your next batch.
- Remove all SCOBYs from the jar with clean hands and place in a clean bowl while you bottle. If using a jar with a valve, you can leave the SCOBY in the jar while you bottle.
- You need to reserve 2 cups of your fermented kombucha. You can use a measuring cup to remove this starter tea before bottling OR use the 2 cup volume marker on the jar.
- Once your kombucha is bottled, store the SCOBY(s) and 2 cups of reserved kombucha in the covered jar at room temperature. You can brew another batch right away OR store the starter tea & SCOBY in the covered jar for up to 4 weeks before brewing another batch.
After fermentation, you can carbonate and flavor your kombucha. Fruit, herbs and flavors should only ever be added to bottles and never touch the SCOBY. There are a few bottling options outlined below, but we highly recommend adding fruit to your bottles because the natural sugar helps with carbonation.
- If you prefer a still, flat kombucha you can bottle and refrigerate immediately. Only trace amounts of carbonation will have developed during fermentation and kombucha won't carbonate in a cold fridge.
- If you prefer plain fizzy kombucha, fill bottles and leave only about 1" of head space. Fuller bottles carbonate quicker. Store bottles at room temperature for 3-5 days before "burping" one to test the carbonation level. If you hear a hiss, it's ready to chill. No hiss? Re-seal the bottle and burp again in 2-3 days. Without added sugar from fruit, plain kombucha will take slightly longer to carbonate.
- If you prefer flavored fizzy kombucha, add ingredients directly to your bottles before filling with kombucha. Leave only about 1" of headspace. Age 2-3 days before burping a bottle to test for carbonation. Refrigerate once the fizz is to your liking. Review our flavoring tips in the next section.
However you decide to bottle your booch, we always recommend using glass bottles (like flip-top bottles). You can find them at craft stores or your local homebrew shop. You can also use our Kombucha Bottling Kit, which includes eight 16oz reusable bottles and caps designed specifically for kombucha carbonation.
- Rinse bottles with water to remove dust, sediment or other potential contaminants.
- Wash bottles with warm water and soap that is NOT antibacterial.
- Add desired flavors to each bottle and top with fermented kombucha to fill. We recommend using a funnel when pouring, but if your fermenter has a valve you can bottle directly from the spout.
- To carbonate, store sealed bottles in a dark, room temperature place. Kombucha will not carbonate in the fridge. Once sufficiently carbonated, bottles should be immediately refrigerated to lock in the fizz and flavor. Otherwise, pressure will continue to build and the flavor will grow more tart.
The sky's the limit when creating kombucha flavors and recipes. Typically we'll pair one or two fruits with an herb or a spice, but don't shy away from using juice, flowers, chia seeds or other ingredients! You can use a different flavor combo in each bottle for variety or make a full batch of one flavor. Just be sure to follow these guidelines:
- You can use fresh, dried or frozen fruit. We do recommend finely chopping fruit to increase its surface area for maximum flavor. Cut into matchsticks, grate, slice or puree.
- If you prefer to use juice instead of whole fruit, fresh squeezed is recommended over bottled whenever possible. If using bottled, be sure that it contains 100% fruit juice. Use a ratio of 10% juice and 90% kombucha per bottle.
- Herbs and spices are a matter of personal taste, but a little goes a long way. You can always add more, but you can't take flavor away. Keep in mind that dried herbs are more potent than fresh.
- Write everything down! Keep a brew journal of your recipes and exact measurements so you can recreate your favorite combos or tweak them in the future.
- Natural sugar from added fruit will accelerate the carbonation process. If your recipe doesn't involve much fruit you might consider adding a small amount of honey, maple syrup, sugar or even kiwi juice to each bottle to aid in carbonation. Some amount of sugar is needed in order to create fizzy kombucha.
DO NOT forget about your bottled kombucha! Flavors will grow more tart and pressure will continue to build if left at room temperature for too long. To avoid bottle bombs, you should test carbonation levels every few days by "burping" the bottles and listening for a hiss. Do not store bottles in a warm place, otherwise they'll over carbonate and burst. Once carbonated to your liking, all bottles should be refrigerated immediately.
Your SCOBY is reusable and will grow with each fermentation. You can ferment with up to 3 SCOBYs, but if the culture becomes thicker than 2" you should peel away and discard the oldest under-layers). Be sure to save 2 cups of fermented kombucha from each batch to jumpstart the next. All you need is 1 cup of sugar and 6 tsp (or 6 bags) of black tea.
Enjoy Your Homemade Kombucha
With Craft a Brew's easy recipe, making your own Kombucha has never been simpler. Enjoy the invigorating taste of homemade Kombucha and the pride of crafting it yourself. Cheers!
Troubleshooting and Expert Tips
Encountering issues? Here are some of our most common Kombucha making FAQs, plus our top tips for success:In almost every case, yes. SCOBYs are quite strange looking and can look different every time you brew. If you're ever in doubt, email us a photo at support@craftabrew.com!
You should enjoy your kombucha within 6 months of bottling for the best flavors. Once sufficiently carbonated, bottles should be kept in the fridge to lock in the carbonation. Do not store bottles at room temp after they’ve carbonated, otherwise CO2 and pressure will continue to build and you could end up with a bottle bomb. Once carbonated, kombucha should stay refrigerated - just like store bought kombucha.
- There are 3 clear signs that your kombucha is fermenting properly:
- It will taste & smell more tart (usually around day 10-14, but may take longer)
- The tea will become lighter in color
- A new layer of SCOBY forms at the surface
If you’re not observing these signs in your batch it could be due to cold fermentation temperatures. Try relocating to a warmer room or insulating with a blanket or towel.
Customize Your Kombucha
Brewing your own kombucha means you’re in charge of the flavors! You can create delicious flavor combinations, use homegrown fruit, in season produce or seasonal spices. Here are 5 of our tried and true flavor combos that you can use with our Kombucha Starter Kit!Apple Cider Vinegar Shots
Sliced strawberries & chopped fresh basilApple Cinnamon Kombucha
Diced apples & cinnamon barkLavender Blueberry Kombucha
Dried lavender flowers & frozen blueberriesWatermelon Mint Kombucha
Watermelon juice & chopped fresh mintTurmeric Honey Kombucha
Ground turmeric, cinnamon & honeyWhy Make Your Own Kombucha?
Homemade Kombucha offers several benefits:
- Saves Money: Once you have our Kombucha Starter Kit, you never need to buy kombucha again! It includes all the tools and ingredients you need to brew infinite batches. The SCOBY and kombucha are continuously harvested to start each new batch - all you need is more tea and sugar!
- Customizable Flavors: Create a Kombucha that perfectly suits your taste preferences. You can control the flavor in each bottle and you can decide just how sweet or how tangy you want it to be!
- Fun and Rewarding: Enjoy the process of crafting your own beverage from scratch. There’s no better feeling than opening the fridge to a selection of homemade kombucha. You’ll never run out of your favorite fizzy drink.
Simplify the Process with the Craft a Brew Kombucha Starter Kit
Making kombucha at home is easy. We make it even easier with our Kombucha Starter Kit. Get a complete starter kit with all the tools & ingredients you need to start brewing at home.
